Prerequisites
Before creating Chatbots, ensure you have:- Access to Studio
- An active Chatbot subscription
- Website access for deployment
You have to whitelist
the domain of your website in the organization settings to use the chatbot.
1
Get Started
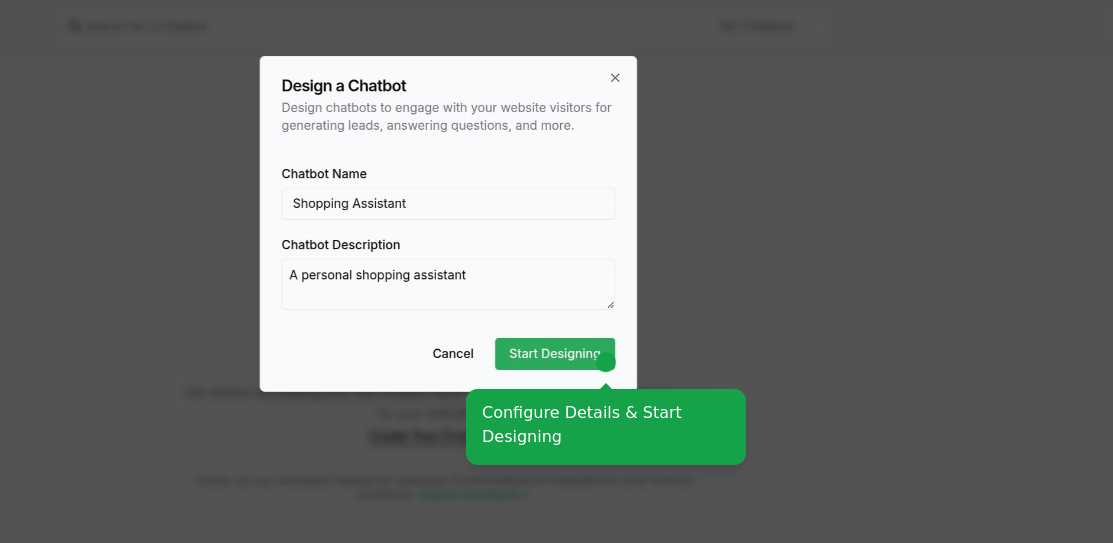
Navigate to the website-chatbots page in Studio and click “Create New Chatbot”.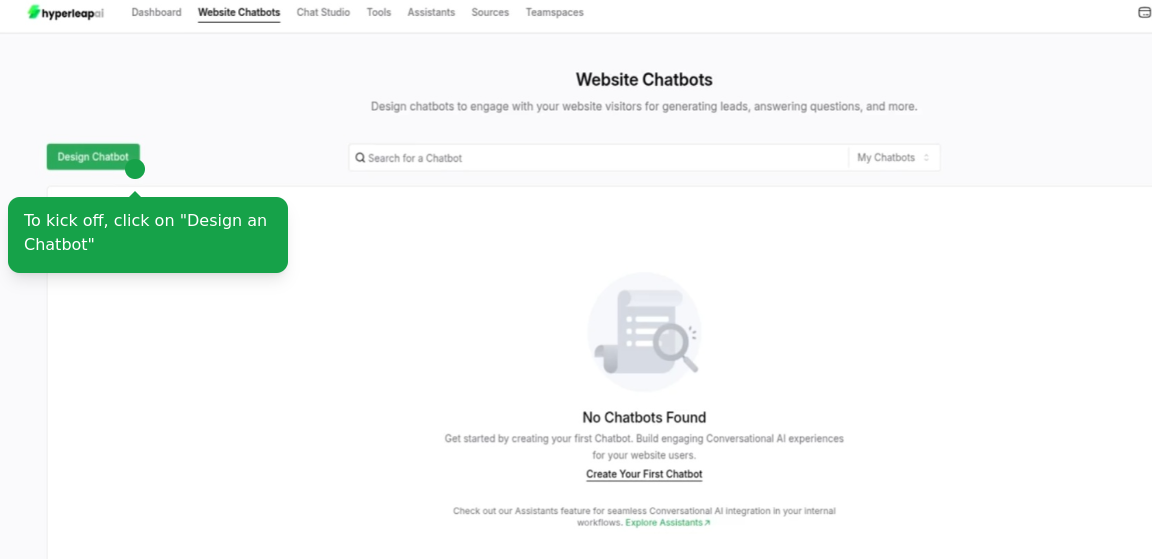
2
Configure Content
Configure your chatbot’s content across different screens:Select a Screen and configure its content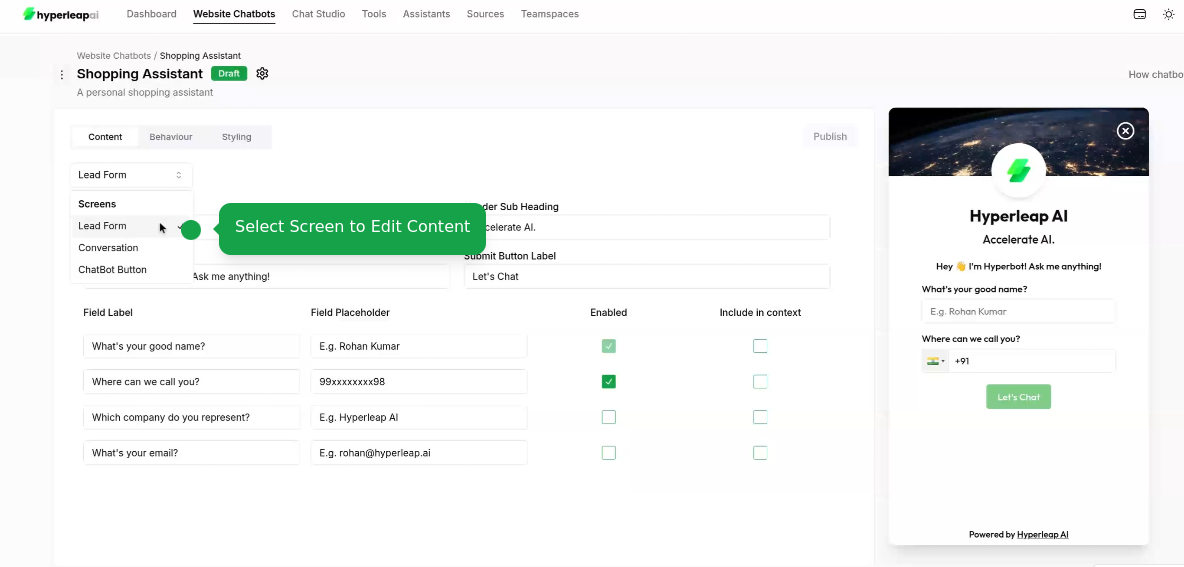
3
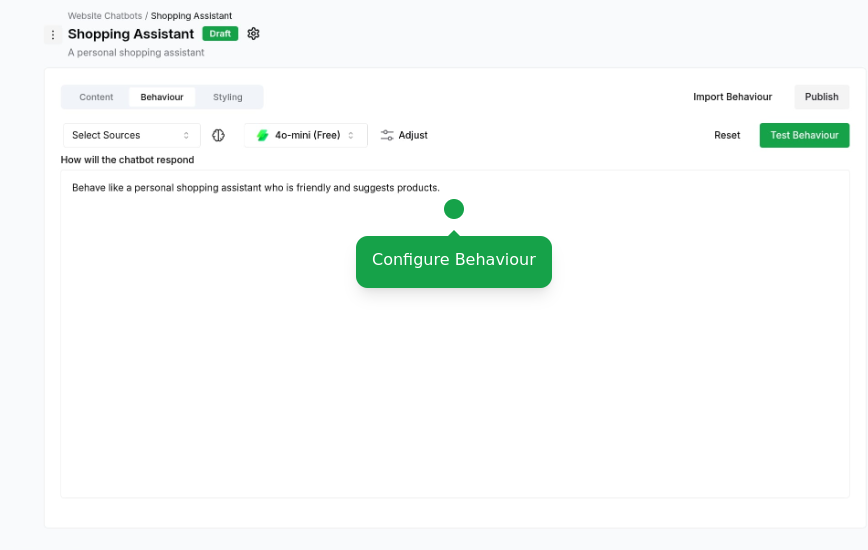
Configure Behavior
Set up your chatbot’s AI behavior and responses:
- Import Pre-built Behavior
- Create Custom Behavior
Quick-start with tested behavior templates that you can customize:
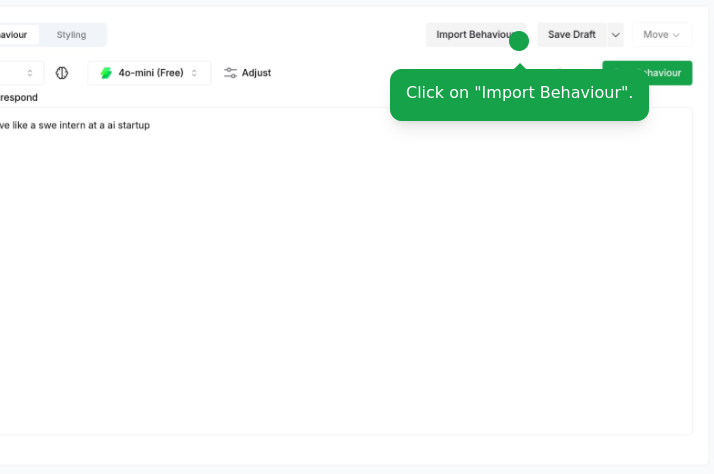
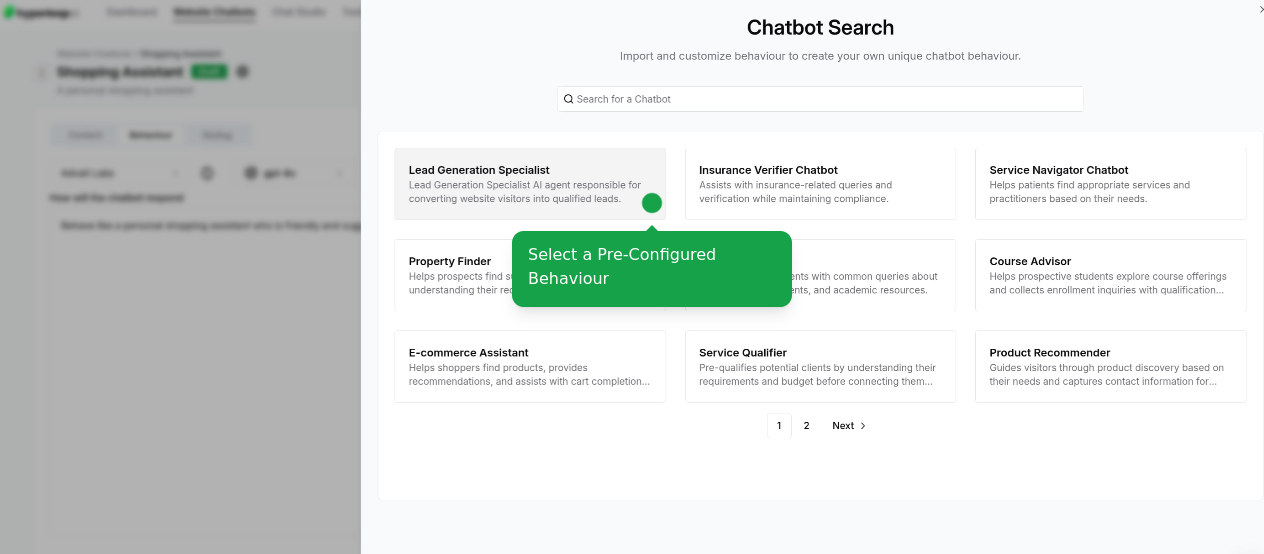
Import Behavior Templates
Import Behavior Templates
Set AI Model
Set AI Model
Choose the AI model that best fits your use case: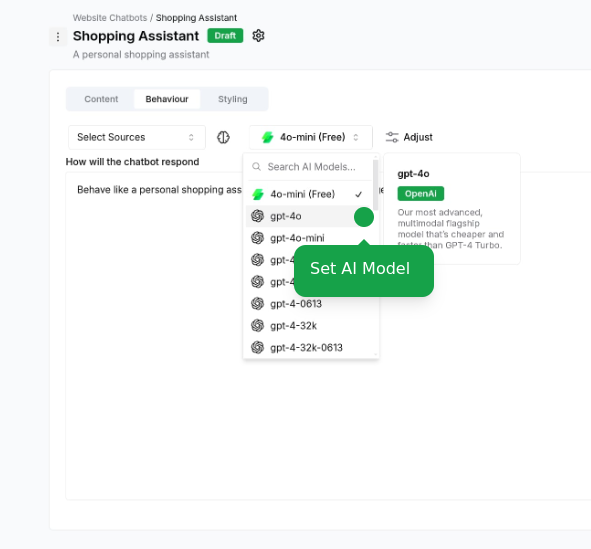
Attach Sources
Attach Sources
Connect your knowledge sources: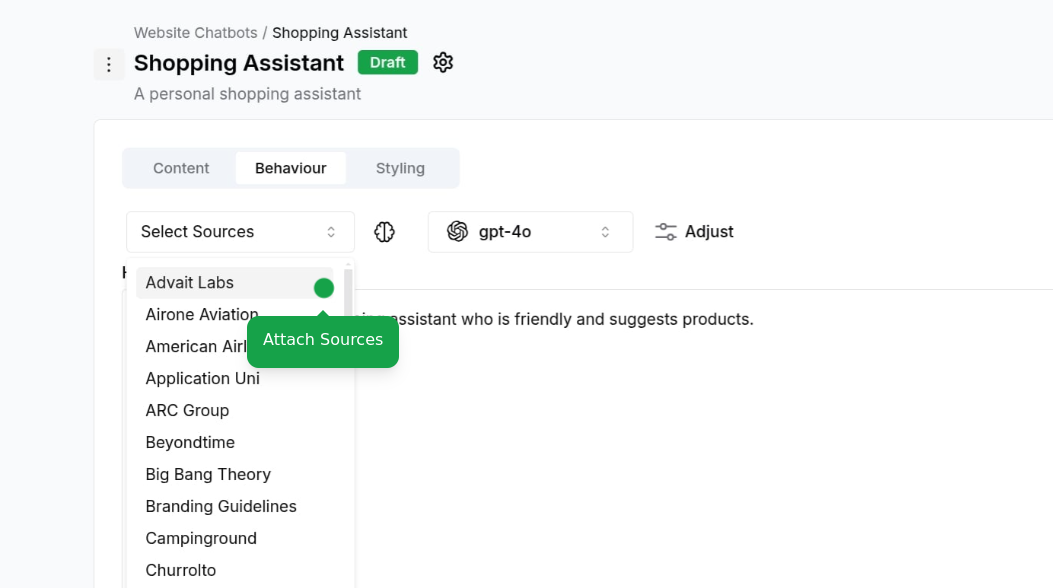
- Upload documents, website URLs, or text content
To learn more about sources, check out the Sources guide.
Adjust Configurations
Adjust Configurations
Fine-tune your chatbot settings: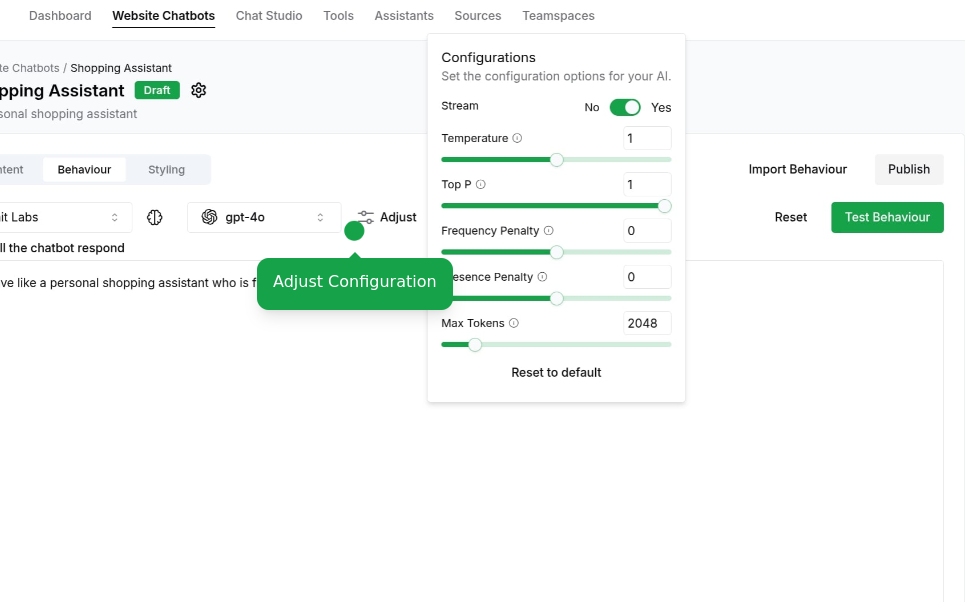
- Temperature, Max tokens, Response length, Memory handling, Context window
4
Configure Style
Customize your chatbot’s appearance:
- Import Style Template
- Create Custom Style
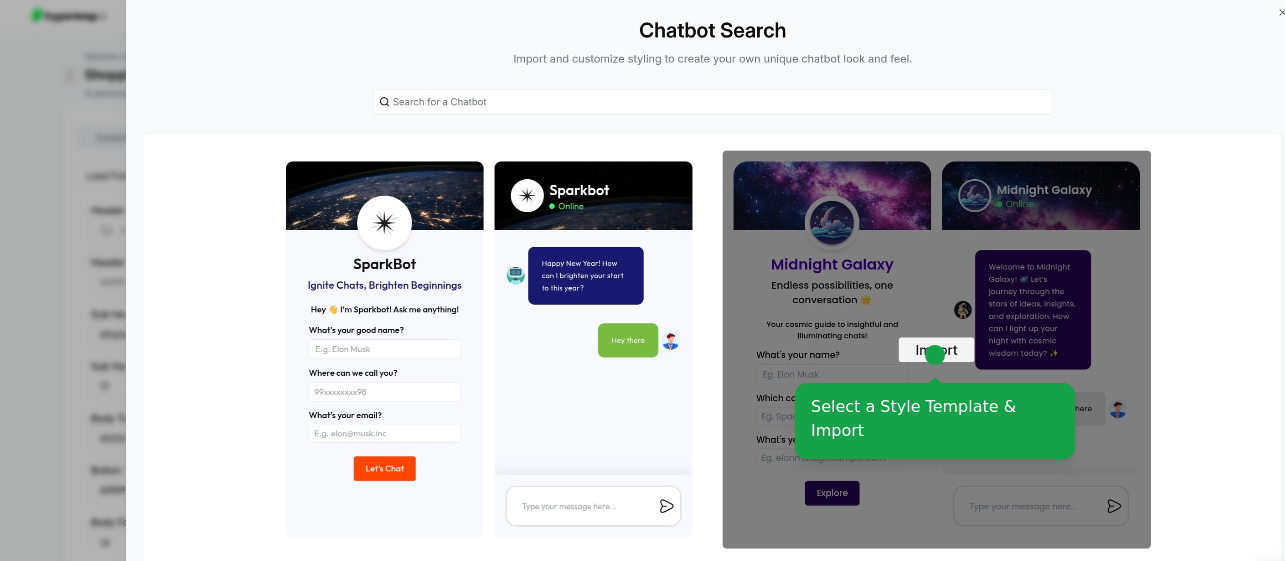
Quick-start with pre-built style templates:
Import Template
Import Template
Start with our professionally designed templates: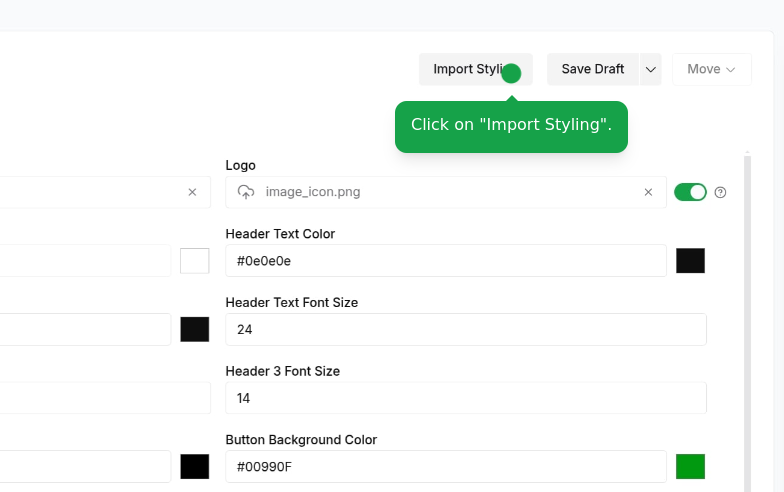
Customize Styling
Customize Styling
Fine-tune the imported template: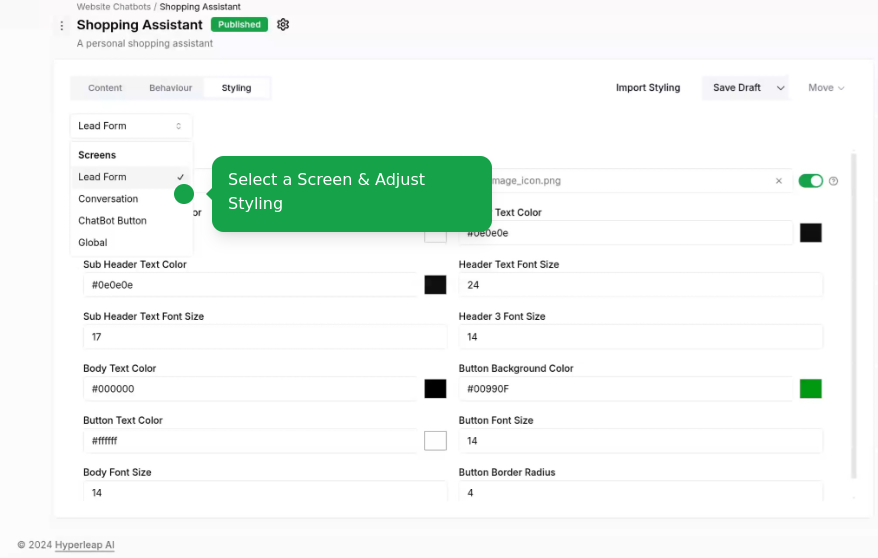
- Global styling
- Lead form styling
- Conversation styling
- Chatbot button styling
You have the option to enable or disable branding for your chatbot.
5
Edit Chabot Settings
Edit the chatbot settings: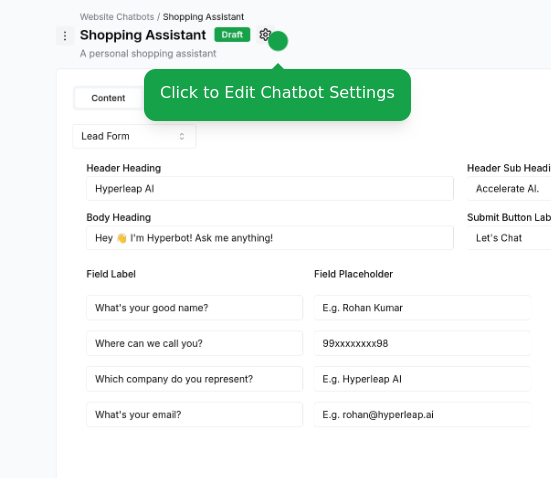
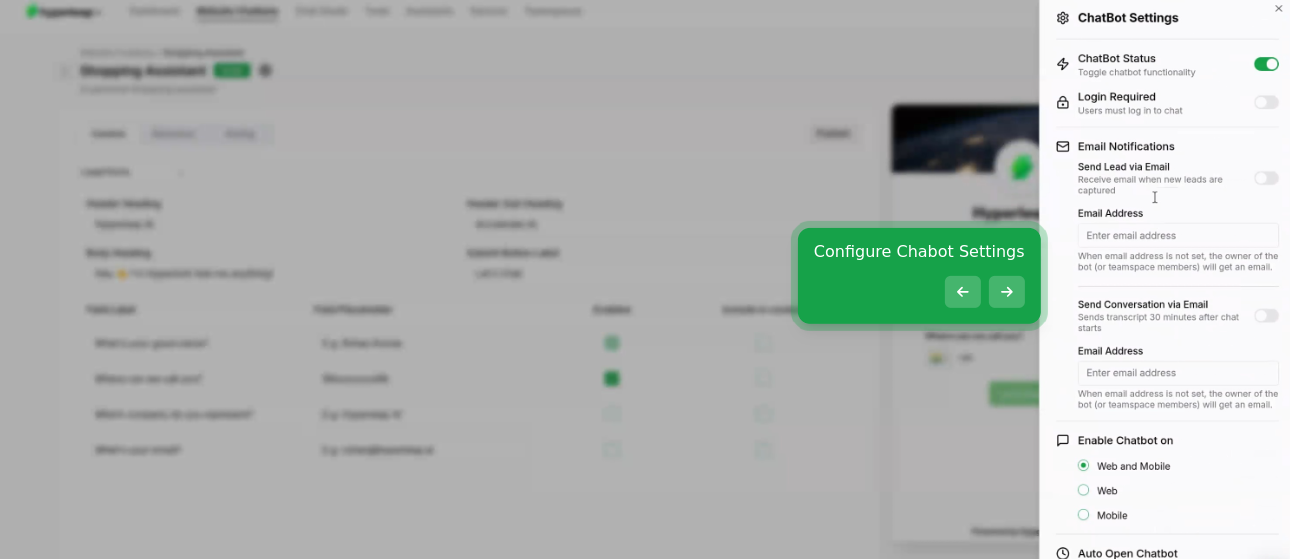
- Enable or disable the chatbot on mobile and desktop
- Require Login to chat
- Manage lead capture settings
- AutoOpen chatbot on mobile and desktop with a delay
6
Integration
Add your chatbot to your website: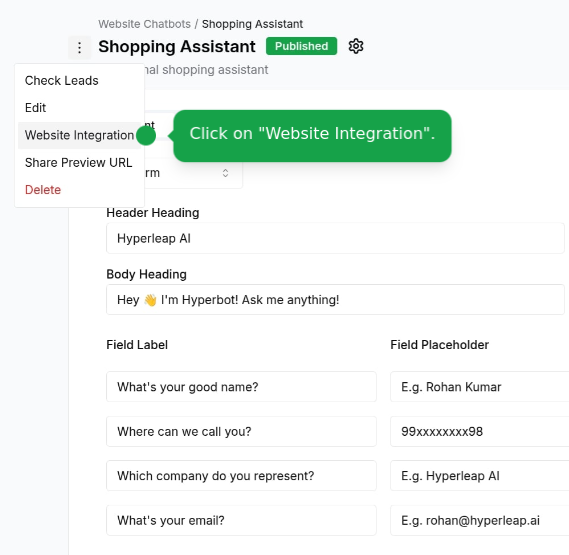
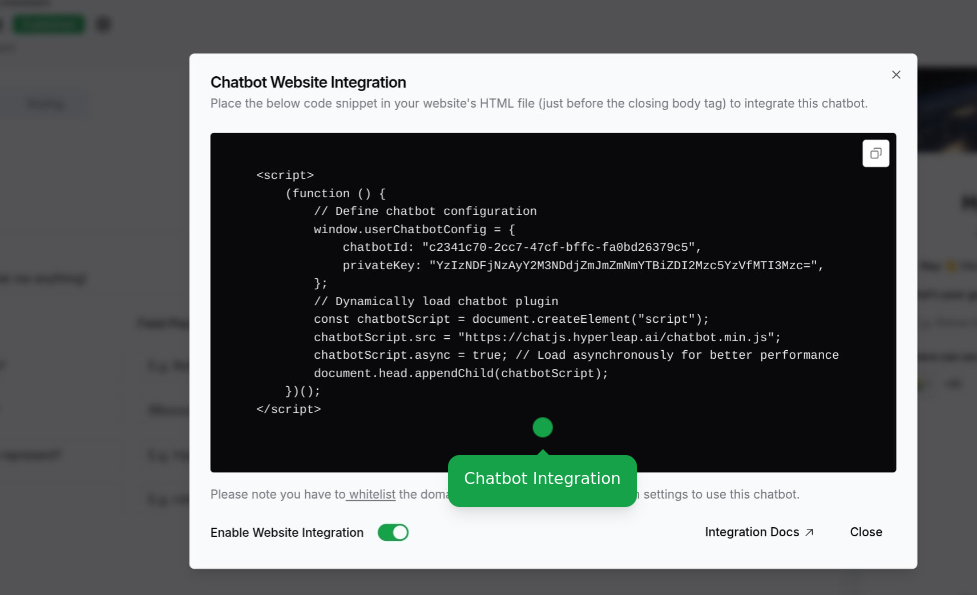
- Publish your chatbot to enable integration.
Users on the Free plan cannot integrate the chatbot. Please upgrade your plan to enable these features.
<head> tag of your website.Asset Types
Your chatbot can share various types of assets with users:Documents
PDFs, Word docs, spreadsheets, and other documents
Images
Product photos, diagrams, screenshots, and graphics
Web Pages
External links to landing pages, documentation, or resources
Videos
YouTube and Vimeo video links that play in an embedded player
Calendar Links
Cal.com or Calendly booking links for scheduling meetings
Programmatic Control
You can control the chatbot from your website using custom buttons or links:- Data Attributes (Easiest)
- JavaScript API
Add the Elements with this attribute are automatically bound when the chatbot loads. No additional JavaScript required!
data-aichatbot-invoke attribute to any HTML element:Features:
- Works with any HTML element (buttons, anchors, divs, etc.)
- Supports dynamically added elements
- Automatically prevents default actions on links
- No duplicate event listeners
7
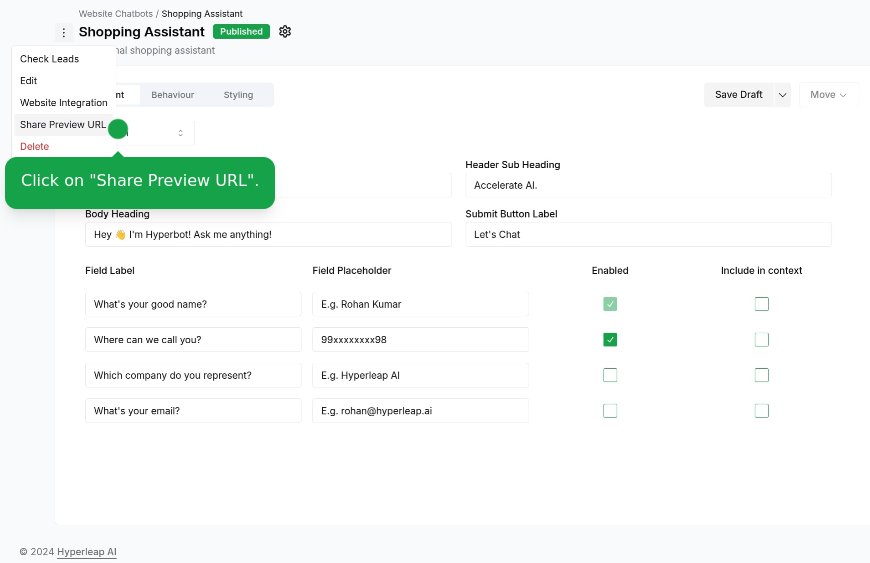
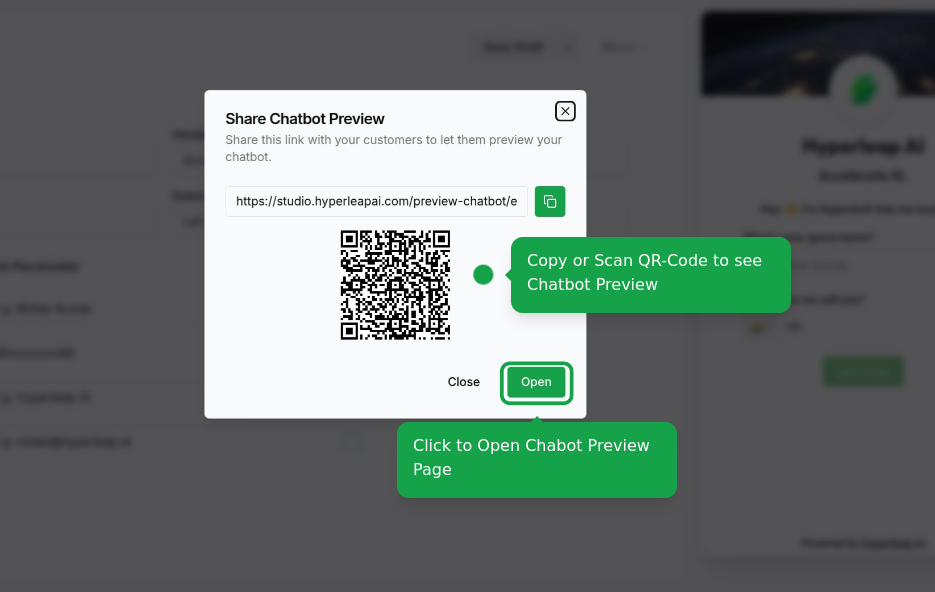
Preview and Share
- Preview on multiple devices
- Share chatbot preview - Share this link with your customers to let them preview your chatbot.
Users on the Free plan can create up to 1 chatbot. Upgrade your plan to create
more chatbots and access additional features.
Next Steps
Return to Overview
Back to Chatbots overview